How to use NextAuth Adapter with Firebase?
In this blog, I will show you how to use NextAuth Adapter with Firebase & Google auth & Tailwind CSS


So, Hello everyone I'm Aman Janwani a 15-year-old Web Developer from India 🇮🇳, Currently studying in Grade 11th.

Let's start with creating the Next.js app and installing Tailwind CSS
npx create-next-app my-project
This command will create a Next JS App and then run cd my-project for getting inside the folder in the terminal, then open your app in VS Code or Any other Code Editor.
Now Let's install Tailwind
For installing Tailwind run this command:
npm:
npm install -D tailwindcss postcss autoprefixer

yarn:
yarn add -D tailwindcss postcss autoprefixer
then run this command to generate both tailwind.config.js and postcss.config.js files.
npx tailwindcss init -p
you will now see 2 files tailwind.config.js and postcss.config.js are created by the previous command so, open tailwind.config.js and replace the existing code with this:
/** @type {import('tailwindcss').Config} */
module.exports = {
  content: [
    "./pages/**/*.{js,ts,jsx,tsx}",
    "./components/**/*.{js,ts,jsx,tsx}",
  ],
  theme: {
    extend: {},
  },
  plugins: [],
}
and then, replace the global.css code with this:
@tailwind base;
@tailwind components;
@tailwind utilities;
Now Let's start with NextAuth
Open your terminal and run this command to install NextAuth:
npm:
npm install next-auth

yarn:
yarn add next-auth
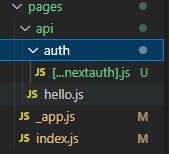
after installing, create a folder named auth inside the api folder then inside the auth folder create a file named [...nextauth].js something like this :
and paste this code inside the file:
import NextAuth from "next-auth"
import GoogleProvider from "next-auth/providers/google"

export const authOptions = {
  providers: [
    GoogleProvider({
        clientId: process.env.GOOGLE_CLIENT_ID,
        clientSecret: process.env.GOOGLE_CLIENT_SECRET
      })
  ],
}
export default NextAuth(authOptions)
In this code, we are Importing the google auth provider from the next auth and then adding it inside the provider array inside GoogleProvider we are providing GOOGLE_CLIENT_ID & GOOGLE_CLIENT_SECRET, now let's see how we can get these credentials from firebase, go to Firebase Console and create a new project and then create a web app inside that project.
after creating a web app go to the Authentication page and then on Sign-in method Tab Click on add provider then click on Google and enable it and then save.
then click on this list

and then expand Web SDK configuration Tab and now you have your GOOGLE_CLIENT_ID & GOOGLE_CLIENT_SECRET, then create a file named .env.local and Paste both of them like this:
GOOGLE_CLIENT_ID=xxxxxxxxxxxxxxxxxxxxxxxxxxxxxxxxxxxxxxxxxxxxx
GOOGLE_CLIENT_SECRET=xxxxxxxxxxxxxxxxxxxxxxxxxxx
Now open your index.js file and replace all code with this :
import Head from 'next/head'
import { signIn, signOut, useSession } from 'next-auth/react'

export default function Home() {
  const { data: session, status } = useSession()

  console.log(status);

  return (
    <div>
      <Head>
        <title>Create Next App</title>
        <meta name="description" content="Generated by create next app" />
        <link rel="icon" href="/favicon.ico" />
      </Head>

      {status === 'loading' ? (
        <main className='flex bg-slate-900 min-h-screen text-slate-100 items-center justify-center'>
            <div className='p-5 h-96 w-[30rem] flex flex-col space-y-10 items-center justify-center border-2 rounded-lg border-slate-700'>
              <h1 className='text-lg font-medium uppercase '>loading...</h1>
            </div>
      </main>
      ) : (
        <main className='flex bg-slate-900 min-h-screen text-slate-100 items-center justify-center'>
        {
          session? (
            <div className='p-5 h-96 w-[30rem] flex flex-col space-y-10 items-center justify-center border-2 rounded-lg border-slate-700'>
              <h1 className='text-base font-medium uppercase '>Logged in as: <span className='text-emerald-400 text-lg'>{session.user.name}</span></h1>
              <button className='bg-red-400 px-5 py-2 rounded-md text-white font-medium' onClick={() => signOut()}>Sign out</button>
            </div>
          ) : (
            <div className='p-5 h-96 w-[30rem] flex flex-col space-y-10 items-center justify-center border-2 rounded-lg border-slate-700'>
              <h1 className='text-lg font-medium uppercase '>Not logged in</h1>
              <button className='bg-emerald-500 px-5 py-2 rounded-md text-white font-medium' onClick={() => signIn()}>Sign in</button>
            </div>
          )
        }
      </main>
      )}
    </div>
  )
}
and now run your app,
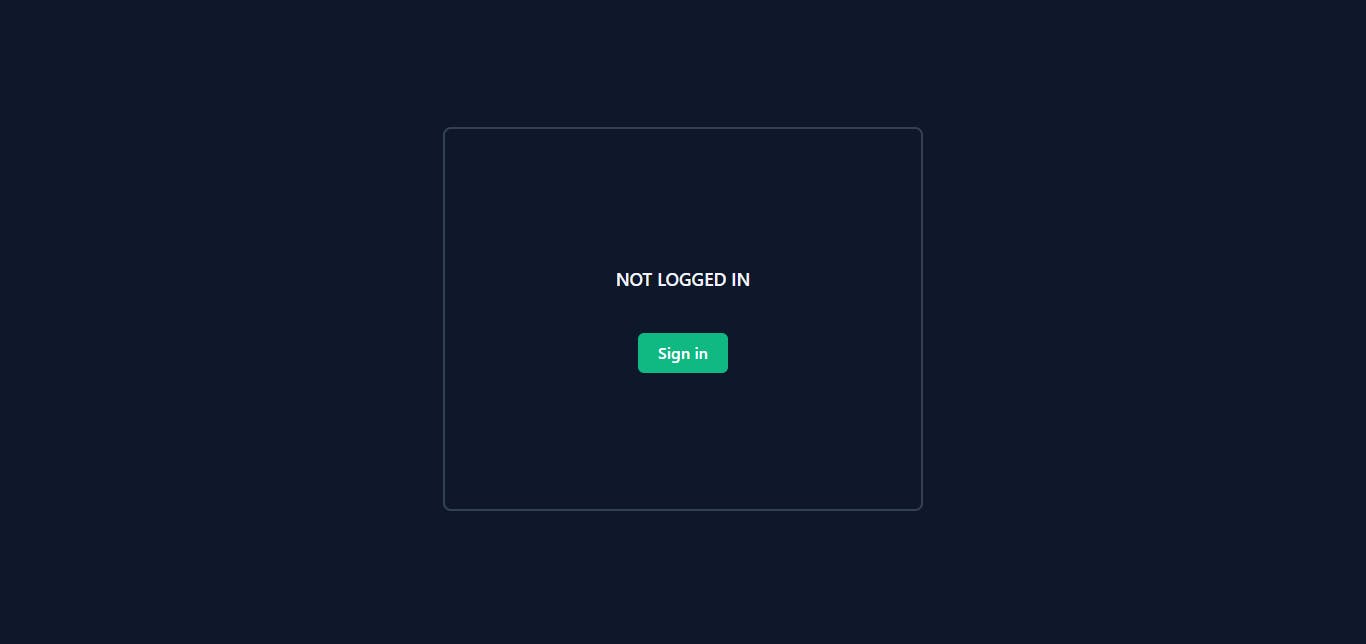
After you will run the app you will see something like this:
Now, you will try to Sign In so go ahead yeah try,
Got Error? something like this?
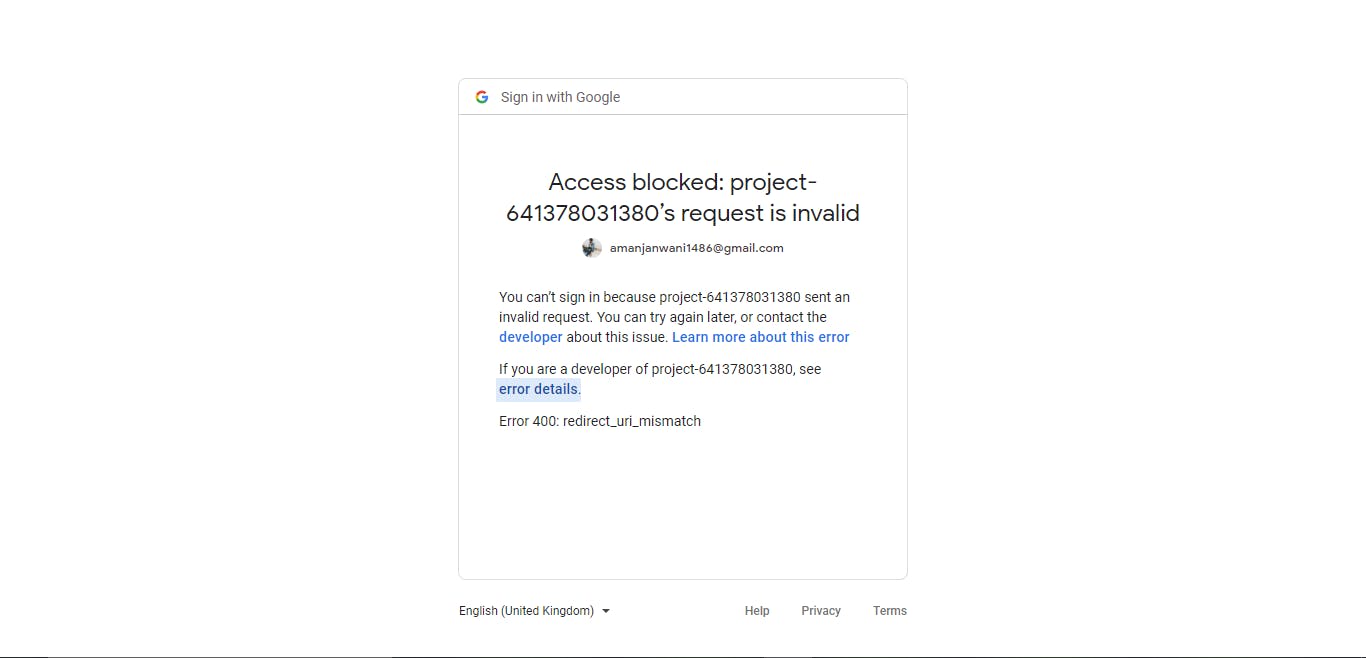
No problem just click on error details and you will see a popup like this:
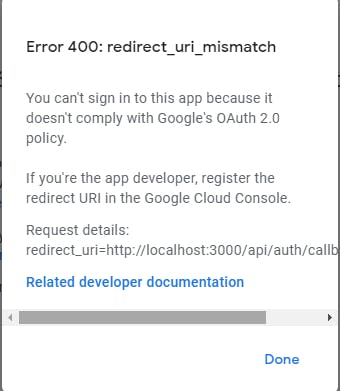
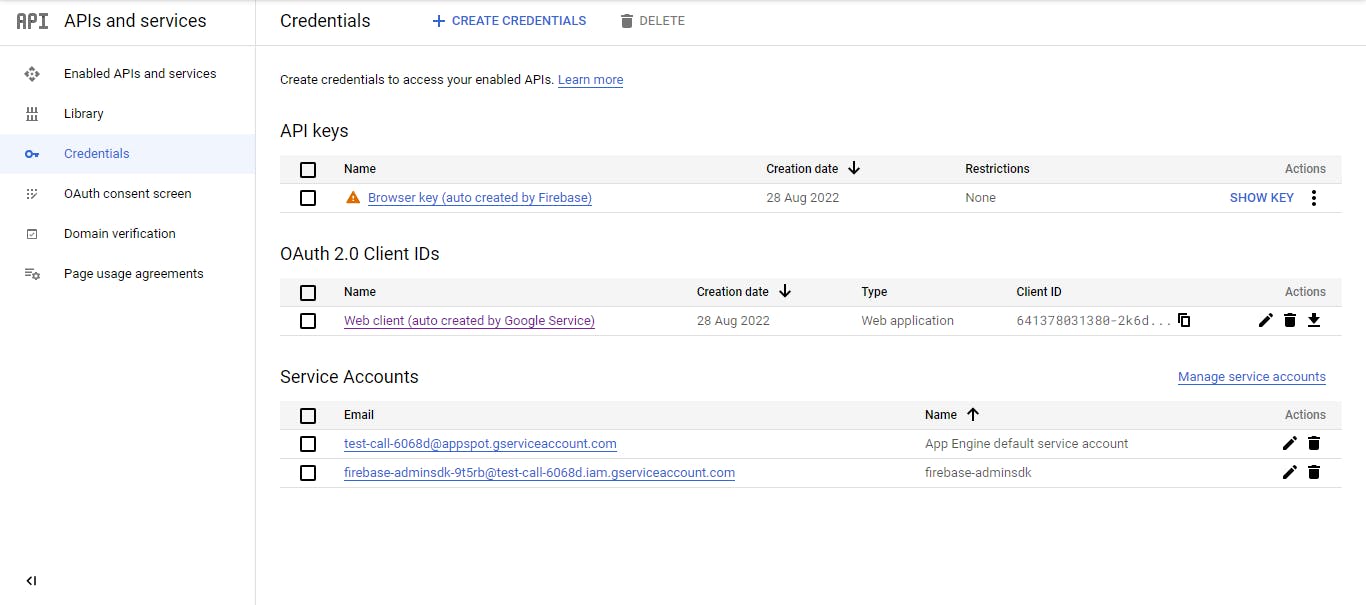
just copy the redirect_uri and go to Google console cloud and then select this app that you have created

Then Click on Web client (auto created by Google Service)
and scroll down to Authorised redirect URIs and click on add URI button and paste redirect_uri and then click on the save button.
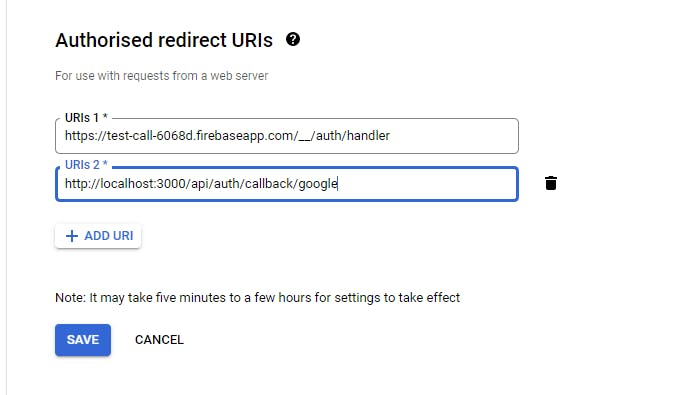
BOOM 💥 DONE Now Try to log in you will be able to.
Now Let's work on NextAuth Adapters
You don't need to do many tasks for this:
First setup your Firebase Firestore
Then, Install this Package For Firebase ("For Firebase" because every type of database has a unique package for Nextauth Adapters you can check here: NextAuth Apdates )
npm:
npm install next-auth @next-auth/firebase-adapter

yarn:
yarn add next-auth @next-auth/firebase-adapter
- Then, Just replace your
[...nextauth].jsfile code with this :
import NextAuth from "next-auth"
import GoogleProvider from "next-auth/providers/google"
import { FirestoreAdapter } from "@next-auth/firebase-adapter"

export const authOptions = {
  providers: [
    GoogleProvider({
        clientId: process.env.GOOGLE_CLIENT_ID,
        clientSecret: process.env.GOOGLE_CLIENT_SECRET
      })
  ],
  adapter: FirestoreAdapter({
    apiKey: process.env.FIREBASE_API_KEY,
    authDomain: process.env.FIREBASE_AUTH_DOMAIN,
    projectId: process.env.FIREBASE_PROJECT_ID,
    storageBucket: process.env.FIREBASE_STORAGE_BUCKET,
    messagingSenderId: process.env.FIREBASE_MESSAGING_SENDER_ID,
    appId: process.env.FIREBASE_APP_ID,
  }),
}
export default NextAuth(authOptions)
- Then, the Last thing is to replace Your
.env.localfile code with the below one: (we are only adding some firebase credentials)
GOOGLE_CLIENT_ID=xxxxxxxxxxxxxxxxxxxxxxxxxxxxxxxxxxxxxxxxxxxxx
GOOGLE_CLIENT_SECRET=xxxxxxxxxxxxxxxxxxxxxxxxxxx

FIREBASE_APP_ID=xxxxxxxxxxxxxxxxxxxxxxxxxxxx
FIREBASE_API_KEY=xxxxxxxxxxxxxxxxxxxxxxxxxxxx
FIREBASE_AUTH_DOMAIN=xxxxxxxxxxxxxxxxxxxxxxxxxxxx
FIREBASE_PROJECT_ID=xxxxxxxxxxxxxxxxxxxxxxxxxxxx
FIREBASE_STORAGE_BUCKET=xxxxxxxxxxxxxxxxxxxxxxxxxxxx
FIREBASE_MESSAGING_SENDER_ID=xxxxxxxxxxxxx
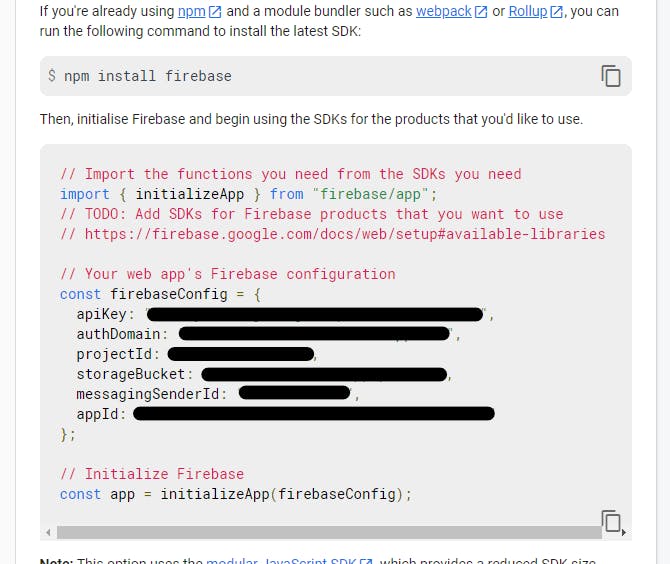
you can get all credentials from the Firebase console setting page, wanna know how?
Let's see:
- Click on this settings icon and then on project settings

- after then scroll to Your apps and then you can copy all the credentials
Done
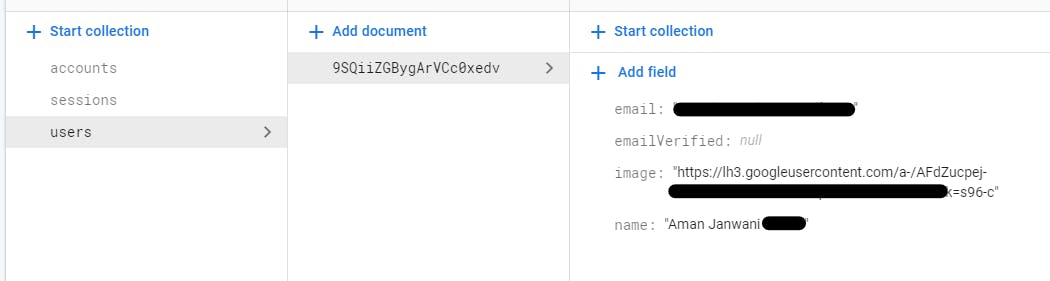
Congrats! you have successfully added NextAuth Adapters to Your app.
Now when you will log in you will see all user data is automatically begin added to your Firestore database something like this:
Link:
Thank You
Hope you found my article useful.
I can't believe I completed the 4article4week Writeathon by Hashnode. Thankyou you so much Hashnode for organizing this amazing Writeathon.